July 2017: Levain Bakery Chocolate Chip Walnut Cookies

ABOUT LEVAIN BAKERY

So…. I had never heard of this place and I’ve even been to New York City before (only once though). I obviously didn’t do my research before that trip because this is a place that I would have 100% visited prior to going gluten free so I could partake in all the beautiful cookies and baked goods that they make.

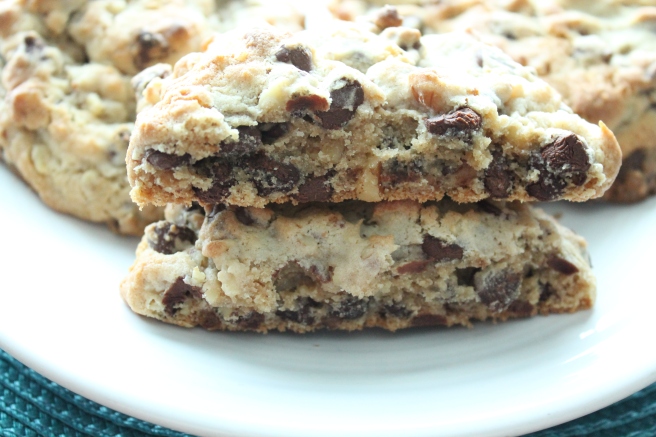
Recently, someone that I follow on Instagram (@sara_ourbestbites) took her family to the big apple and this was a must on their “to do” list.  She posted all of the cookies that they purchased and I have to say folks, it made me drool.  These cookies are extremely large and soft.  It’s almost like they wanted the middle to be cookie dough…. but not.  It’s super hard to explain but I do know that they try to intentionally under bake them so the center is gooey.

Levain Bakery was created by two women who ran a lot and need extra calories to keep them going (SAY WHAT!?!?!?!).  So they set out to create the greatest chocolate chip cookie ever.  Once they did they said, “heck we should open a bakery and sell these guys!” and the rest was history.  You can visit their site at levainbakery.com and order their gluten filled versions that will be shipped directly to your door.

IMG_2480

LET’S MAKE IT GLUTEN FREE

Of course when I saw these delicious, ooey – gooey cookies on Instagram I just had to figure out how to make them gluten free.  I mean, why do we have to miss out? I have to say, it actually was pretty easy to find a recipe to convert.  Regulating my oven on the other hand wasn’t so great but more about that later.

Of course Levain doesn’t publish their recipe online though if you go to YouTube you can find a video of the owners making a batch (which is sort of helpful and a lot entertaining).  They show all of the ingredients but do not go into detail.  That left me to my pal Pinterest.

IMG_2478

FINDING A LEVAIN COPY CAT RECIPE

I fired up my trusty sidekick, Pinterest, and started searching for Levain copy cat cookie recipes.  There were a ton out there and they covered the flavor gamut (OMG = dark chocolate peanut butter chip!!!) but I wanted to stick to the original chocolate chip walnut. Of course every recipe I found was full of gluten but that’s ok,  I just need a tiny bit of a starting point in order to convert the recipe over to a gluten free one.

I settled on a recipe from the blog A Bountiful Kitchen.  This lady seemed just as excited as I was into recreating these buddies and her original recipe contains tons of details & tips that you must go read before starting: A Bountiful Kitchen Levain Chocolate Chip Cookie Recipe

The best tip on the blog noted above is that if you want to sub out the walnuts you must replace it with something else or the recipe WILL flop.  I only tested it with the walnuts included in the recipe so if you decide to take them out… you are on your own – please try her tips to make it work.  I will not be responsible for how they turn out.  I’m glad we had this talk.

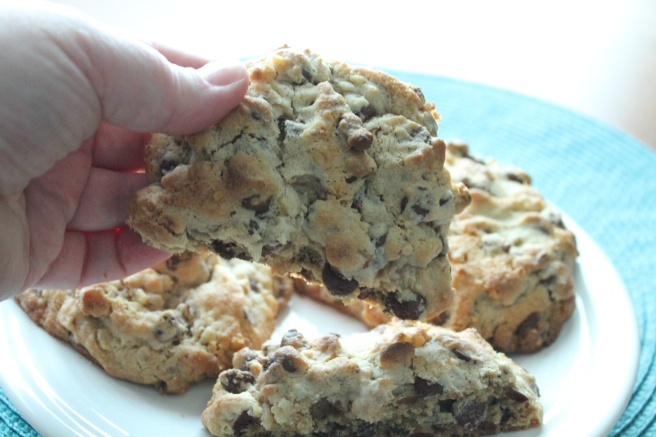
One last thing before we jump into the recipe…. these cookies are GIGANTIC.  They are meant to be that way.  The hand model in the picture below on the left is my lovely twelve year old daughter. Granted she does have small-ish hands but seriously, HUGE cookies are coming your way if you decide to make this recipe!  I put a picture of my not so small hand (on the right) with a cookie in it next to her picture so you can at least get a gist of the size of these things….  You will not be disappointed if you make some and you can probably feed your entire neighborhood with one batch!

THE GLUTEN FREE LEVAIN CHOCOLATE CHIP COOKIE WALNUT RECIPE

Adapted from the recipe on the blog A Bountiful Kitchen.

Ingredients:

  • 1 cup butter cut into tablespoons (I always use salted!!)
  • 3/4 cup light brown sugar
  • 1/2 cup sugar
  • 2 eggs
  • 385g gluten free flour*
  • 1 teaspoon baking powder
  • 1 teaspoon baking soda
  • 1/2 teaspoon coarse sea salt
  • 2 cups walnut halves coarse chopped (I like them a bit smaller than halves)
  • 2 cups semi sweet chocolate chips


*I used cup4cup for this recipe because it is more like cake flour than other gluten free flours.

Instructions:

  1. Pre heat oven to 400 degrees and set rack in middle of oven.
  2. Place butter into bowl of your stand mixer. Using the paddle attachment turn it on low.
  3. Add the sugars and beat butter until smooth on medium speed. Mix until the butter pieces are completely blended with the sugar and is no longer visible in pieces.
  4. Add the eggs and beat on medium just until incorporated with butter and sugars.
  5. Turn the mixer off. Add the gluten free flour, baking powder, baking soda and salt. Mix the dry ingredients on low until everything is mixed together.
  6. Pour the walnuts into the batter all at once. Mix them in on low (alternative is to hand mix these in).
  7. Pour the chocolate chips into the batter and mix them in on low (alternative is the hand mix these in.)
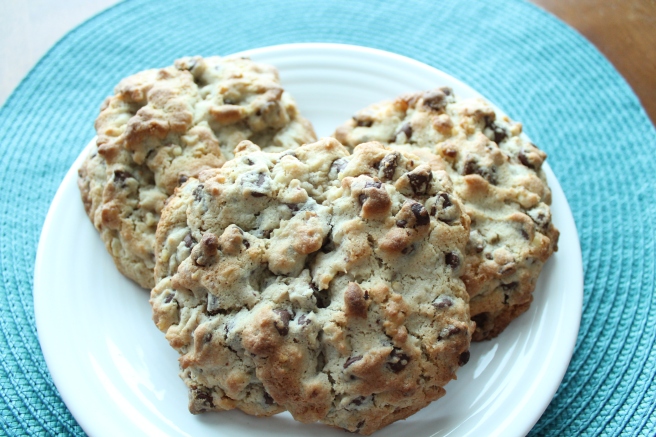
  8. Divide the dough into 8 equal pieces. Use your hands to shape cookies. Do not use a cookie or ice cream scoop. The cookies are meant to be roughly shaped. Do not flatten the dough.  I also place a few extra chocolate chips on the top so that it looks good and I say more chocolate chips the better!
  9. Bake 4 cookies per pan, for 10 minutes or so…. **
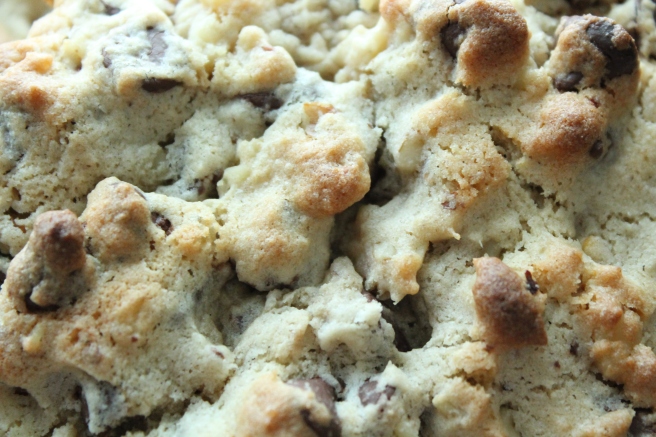
  10. The cookies are done when the top is a bit golden and the bottom is also golden.
  11. Do not over bake. Let cool for 15 minutes before serving.

**This is where it gets interesting for me because the blog recipe I used to convert over to gluten free had instructions for regular ovens and convection ovens.  I have a convection oven (I’m pretty sure anyway) but when I baked them at the lower time period noted in the original blog recipe – they were not done.  When I baked them at the longer time, they definitely were a lot browner and less gooey, so I stuck with 10 minutes.  I also tried to chill some of the dough before baking and I didn’t really see that it made any difference in this recipe.


IMG_2487

IMG_2490

February 2017: Cherry Kiss Brownie Bites

THIS MONTH’S SCOOP

I had lots of ideas for the February dessert.  There are just so many options when you have a holiday like Valentine’s day to work with!

I mean it’s the month of L-O-V-E! This means lots of red food coloring, pink sprinkles, and edible heart confetti and glitter by the truck loads!

Even with this plethora of bakery magic, I settled on this quick treat because I had these cherry cordial kisses that I wanted to incorporate into a dessert and it had to have chocolate because come on – Valentine’s day!

WHERE DO WE GET THE KISSES

Now, these kisses are a Christmas Holiday treat from Hershey’s that I got at Target (because if it ain’t at Target, you don’t need it – HA!).  You actually cannot find them now which I think is a total marketing flop on their end.

I do not associate cherry cordials with Christmas. I associate them with Valentine’s day.  Heck we even have a local candy manufacturer (you read that right, it’s within miles – BAM!) that puts them on special for Mother’s day.  So just having them available for the Christmas holidays is a total snafu on Hershey’s part.

One good thing for me is that I got some on clearance – so YAY ME! The other good thing is that you do not need these in order to make the brownie bites. You can make them without OR you can sub some other kind of kiss that you like. I bet the caramel ones (since they are also gooey) would work out really well here!

th

HOW IT CAME TOGETHER

I’ve made these gluten free Nutella brownie bites from the Gluten Free Canteen for years now.  They are always a big hit, but I wasn’t sure how the whole hazelnut flavor would go with the cherry so I wanted to make them just plain chocolate but what would I replace the Nutella with?

Then it hit me like a load of bricks: HOT FUDGE.  I had recently purchased this dark chocolate hot fudge hoping it was like the cocoa fudge sauce from the Dairy Queen but it 100% wasn’t even close.  In fact, I didn’t even care for it much and I kind of wanted to get rid of it.  So I subbed that for the Nutella, used gluten free oat flour that I made myself and added some baking soda……..

AND – it worked like a CHARM!

img_2263

EXPLAIN YOURSELF

So I may have made some confusing comments up above.  You read it correctly that I used ground gluten free oats as the flour -this contains no gums or anything.  I simply took some certified gluten free oats and threw them in my mini food processor.  I processed those babies until they were a fine flour (as fine as oats can be).

I also used no sugar!  The hot fudge has plenty of sugar and stuff to make these a decadent and sweet treat.  So no extra sugar needed! YAHOO!

Since Nutella is a bit thicker than the hot fudge, I thought I should use something to give the brownies a little rise so I solved that with the baking powder.

Lastly, I do not like regular eggs for this recipe – nor do I like them in the Nutella brownie bites either.  I prefer to use egg substitute which I agree is not the best but it really creates more of a brownie feel and crumb to these bites.

img_2251

SOMETHING ELSE EXCITING!

You can make these brownie bites with the kisses directly on the brownie bite like this:

img_2261

OR you can do them up with any color frosting of your choice. I chose pink of course because it’s pink-a-licious and it’s VALENTINE’S DAY!!

img_2250

FULL RECIPE FOR YOUR GLUTEN FREE ENJOYMENT

Cherry Kiss Brownie Bites

adapted from the Gluten Free Canteen Nutella Brownie Bites recipe

Brownie Ingredients:

  • 6 ounces of Hot Fudge sauce
  • 4 Tablespoons of Egg Substitute (I use egg beaters)
  • 4 Tablespoons ground oat flour
  • 1 Tablespoon unsweetened cocoa powder
  • 1/2 teaspoon baking soda
  • 1 teaspoon vanilla
  • Hershey’s Cherry Cordial Kisses (or any other kisses)

*Please ensure all ingredients are gluten free!

Brownie Bite Instructions:

  1. Heat oven to 350 degrees.
  2. Mix all of the ingredients really well either by hand or with a mixer.
  3. Spray 12 mini muffin tin with gluten free cooking spray.
  4. Using a small cookie scoop, distribute the batter amongst the 12 mini muffin wells.
  5. Bake the muffins for 11-12 minutes.
  6. NO FROSTING OPTION: Place kisses into brownies.  Make sure to push them down a bit.
  7. Let them cool completely.
  8. Run a dull knife around the edges and pop out of the tin. Cool further on a wire wrack.

Buttercream Frosting Recipe (1/2 Batch)

Frosting Ingredients

  • 1/2 cup butter (1 stick), softened to room temp
  • 2 cups of powdered sugar
  • 1 Tablespoon (or less to taste) vanilla
  • Pinch of salt
  • 2-4 Tablespoons of Heavy Cream (do not use milk – trust me)
  • food coloring of choice

Frosting & Assembly Instructions:

  1. Put softened butter in the bowl of your mixer
  2. Using the paddle attachment, start whipping the butter.
  3. Put in the pinch of salt and the vanilla
  4. Carefully incorporate the powdered sugar on low
  5. Add at least 2 Tablespoons of the heavy cream
  6. Once it is mixed together turn the mixer to med-high to high and let it rip.
  7. Check it often to see if it is the consistency you want and also to ensure it is getting nice and fluffy.
  8. Put completed frosting into a piping bag fitted with the tip of your choice. I used a large star tip for mine.
  9. Pipe onto completely cooled brownie bites and add a Hershey kiss to the top, pressing down slightly!

img_2257


Enjoy and Happy Valentine’s Day!!!

Happy 2017!

WHAT’S GOING ON AROUND HERE?

I have taken a little break from blogging (hello – over a year! ha!) but decided I needed to give it another try. I really love to bake and writing more is an intention I have set for 2017.  So I got to thinking, how I can I do this without stressing myself out and still have fun with it…..

Last year a gluten filled friend of mine was baking a different cake each month just to try out new recipes and then posting pictures of them on Facebook. I really enjoyed her posts because I love to bake so it was fun to see her go out on a limb like that.  Seeing all of this over the course of 2016, I thought it was sort of a cool concept but of course I would take a gluten free spin on it.  

So my creative side started churning and I declared, “YES! I will bake a new gluten free cake each month.” but…. even that started to stress me out a bit… so I’m going to take creative license and say that I will be baking some sort of gluten free “dessert” each month and it will be anyone’s guess what it will be.  I’m looking at those old favorites that we all love so I can convert them into a gluten free version.  I’m also looking at potentially some new recipes too but maybe not, we shall see.  

I think the key for me is to not put too much boundaries around it but to just do it without stressing myself out or not having fun with it.  I love to bake and I love to make good things gluten free but I never want to feel like it’s a “chore” or that I have to do this.  There are just so many other things that I “have to do”.  This should not be one of them.  Blogging should evoke joy and fulfillment for me and I’m committing to keeping it that way.

NEW ADVENTURES AWAIT

So join me this year and see how it all unfolds.  It really is time for a new adventure in more ways than one!  New desserts, hopefully increased photography skills, and a bunch of fun.  I know my kids will have tons of fun eating all of my creations and I will be sharing them with neighbors and friends too.  So here’s to good eating and having a great gluten free 2017!!

HAPPY NEW YEAR!

My Whole30 Experience

Last week when I posted the May meal plan, you probably noticed that I referred to a program called “Whole30” and how I made meals compliant or not.  I’m sure you thought, what is wrong with this lady, has she lost her mind? Sometimes I think so, really, I do.

WHAT IS WHOLE30?

Whole30 is a 30 day eating plan primarily consisting of protein, veggies, and healthy fats, with minimal fruits.  You cannot eat any grains (gluten free or not), sugar in any form (not even stevia, etc…), no alcohol, no dairy, no preservatives, and no legumes (beans, peas, etc…).  You are to eat three meals a day with no snacking or anything in-between if you can.  Your meals should be large enough to sustain you until the next meal time.  You need to stop eating two hours before bed.  There are a host of other rules too that you can check out on their website.

It sounds super restrictive but it’s actually not that bad.  I found making meals and keeping it fresh through the program pretty easy actually. I mean come on – I literally put homemade mayo on everything, what can be better than that?  I also snacked a bit.  If I was hungry, I ate.  That’s how I roll.  Honestly though, I wasn’t hungry much in-between meals.

The plan overall is supposed to improve your health in many areas including weight loss and non-scale victories, like being able to sleep better or wake up easier, increased energy, healthy skin and hair, etc….  They also claim that many participants experience something called “Tiger Blood” where you just feel like you can do anything with the extreme energy burst that this program gives you. Insert confused look here because that so did not happen to me.

WHY WOULD YOU DO A WHOLE30?

Good question because I asked myself this almost every single freaking day.  First off, last month I posted about how I just wanted gluten period.  Well it had gotten to a point where I wanted it all day every day.  I already know that gluten does not do well within my system since I’m gluten intolerant (I’ve never been tested for celiac disease). I was experiencing so many symptoms and I was in a downward spiral.  I knew that if I didn’t do something soon, that I could do some real damage to my body.  I needed a reset of sorts, to get my brain around the fact that gluten and I do not get a long.  Enter, the whole30.

HOW DID YOU FIND OUT ABOUT THE WHOLE30 PROGRAM?

I first heard about this program from the clothes make the girl blog about a year or so ago.  Melissa Joulwan, the author of this blog, is a big whole30 fan and will do it several times a year to reset herself after a long trip or something like that when she falls off her paleo wagon.

Since she does it so often, Melissa actually created two cookbooks that are whole30 compliant.  They are Well Fed and Well Fed 2.  Without these books, I would have NEVER made it.  The recipes are super awesome and flavorful.  I highly recommend getting at least Well Fed 2 for the awesome sauce recipe that I put on literally everything – seriously, ask my family.

WHY DID IT TAKE YOU SO LONG TO DO THE PROGRAM?

Well, frankly, it scared the bejezus out of me.  I just didn’t understand why people would do this to themselves.  Why would I give up bread and cheese?  chocolate and soda/pop?  Why would I give up my coveted coffee shop drinks for a whole 30 days??? WHY?  It just seemed completely bonkers and out of reach to me.

But then when I started to go hog wild with the gluten I knew that I had to do something and super fast.  I had already studied the program a bit and had purchased the latest whole30 book.  It didn’t seem so bad and I was desperate.  Plus they claimed major weight loss and this tiger blood.  Hells ya, I had try it out.

SO, HOW DID IT GO?

Well, unfortunately for me, it went just “OK”.  I made it through a whole 30 29 days with compliant meals.  I almost quit at least over half of those days which was an interesting mental struggle that I got to see play out.  In fact, some say the first week is the hardest and man is it hard but the last week was the super duper hardest for me because I wasn’t feeling all the tiger blood or weight loss.

Oh yea, I said feel the weight loss because you are NOT supposed to weigh or measure yourself until you are 100% finished with the program.  This is a big deal to most, but not to me. I hate the scale.  But I could tell that my clothes were not getting super baggy, so that was a sign that not much was happening.  I did end up losing 5lbs, 2 inches from my waist and 4.5 inches from my hips.

I do find that I can wake up easier to go to my early morning workout class and that recovering from those workouts is much much easier than I’ve ever experienced. So that has been very nice.

But mostly, I felt super crabby about this whole thing up until day 18 or so.  Then I sort of just felt at peace with it.  Then day 25 hit and I was like, “I’m over it. Why am I doing this?” all over again.  These thoughts plagued me for the remaining days.  That’s why on the actual day 30, I said to myself, “Screw it, you deserve a frappucino.” So I got it.  The funny thing was that at the end of that day, I ate my whole30 food for dinner and on day 31 (today), I’m pretty much back to the same routine because *GASP* I kind of missed the food.  This surprises me the most.

I’m also seeing how dairy and sugar affect me since those are the two foods I introduced back.  So far, the dairy is ok but the sugar kind of makes me have a flush face and warmth that comes over me.  I don’t recall this reaction ever before.  It’s making me wonder.  Next up will be gluten free grains.

WILL YOU CONTINUE THIS WAY OF EATING?

I’ve thought long and hard about this actually.  I of all people am completely floored that I missed the food, so now I plan to eat mostly paleo with some dairy thrown in.  Unfortunately sugar is in every single thing so it will be hard to avoid but I’m going to dabble in using other forms of sugar like honey, coconut palm sugar, and pure stevia.

WOULD YOU RECOMMEND THIS TO OTHERS?

Yes, if someone asked me but I’m not going to go around evangelizing that this changed my life.  I’m not there yet and I didn’t feel any of the major components that the program said you’d experience.  It has helped me in a lot of ways and upon further reflection I’ll have a clearer idea of what all of that was.

Right now, I’m just glad it’s over!

Gluten Free Menu Plan: May 2015

May has been a little bit of an interesting month for us.  I’ve been doing a “Whole30” in order to reset and get back to basics.  Our menu will reflect a lot of that which includes whole/clean foods and everything cooked or made from scratch. Do not be afraid, it’s really easy in the end. Trust me.

Some of the items will be regular gluten free items as well.  Though I am not a fan of making separate meals, I did not want my kids to feel like they were missing out on their regular fare.

SAMPLE MENU PLAN FOR MAY 2015

SUNDAY: Spaghetti and Meat Sauce

This month for our pasta I again used Barilla Gluten Free Spaghetti because it is just the best I’ve found to date and the whole family loves it.  To make it whole30 compliant for me, I baked up a spaghetti squash and shredded it.  I have to say that I have been very skeptical of this food replacement. Super skeptical. No way is a squash pasta – NO WAY.  But I baked it up and shredded it and WOWSERS – IT WAS AWESOME.  Since I’m not a huge pasta fan anyways, this really was a great alternative for me.

For the sauce, I used the organic marinara sauce from Aldi called SimplyNature.  Again, not a huge fan of Aldi but they do have some great products that I do not mind stopping in for.  Their organic marinara sauce has simple clean ingredients: Organic Tomato Puree, Organic Tomatoes, Salt, Organic Onions, Organic Garlic Powder, Organic Basil, Organic Oregano, Organic Garlic. That’s it.  No sugar or other funky ingredients and it tastes awesome!

To the sauce, I simply fried up a pound of grass fed ground beef with a diced onion (one whole), seasoned it with salt, pepper, and garlic powder (from Penzey’s). Once the meat was done, I threw the sauce in to heat it up and served it over the spaghetti and squash with a nice side salad.

MONDAY:  It’s BRINNER night!  Scrambled Eggs with Sausage andToast

What’s Brinner? It’s breakfast for dinner of course.  I love to have breakfast for dinner at least once a week because it’s quick and easy.  This month, we started softball and baseball so I need to have some quick meals ready to go so we can get to the fields by 6pm.

For tonight’s meal I simply scrambled some eggs, toasted some Udi’s bread, and made up a packet of Hormel Little Sizzlers sausage which is naturally gluten free. For me to make it Whole30 compliant, I skipped the toast, and made my own sausage which I will post the recipe for soon – I promise!

TUESDAY: TACOS!

This is an oldie but a goodie for sure.  Tacos are a regular stand by around here.  Last month I pointed you to all of our favorite products for quick and easy tacos.  I made them whole30 compliant for me by baking some plantain chips (from the Well Fed cookbook) and using them with my taco salad with lots of guacamole.

WEDNESDAY: Chicken with Sundried Tomato Cream Sauce and Rice

I stumbled upon this recipe on Pinterest, the danger hole of the universe that we all hate to love.  It’s from the Damn Delicious blog which is a fantastic food/cooking blog. All of the ingredients are gluten free – YAY!  Except they were not whole30 compliant – BOO!  All I had to do was swap out the “heavy cream” for some full fat coconut milk (I ended up putting in 3/4 of a cup to make up for the loss in cheese), replace the butter with ghee, and eliminate the cheese all together, and BAM, everyone got to party. I also subbed out the chicken thighs for chicken breasts because thighs – um, no. I simply served this over rice with a baked zucchini on the side.

THURSDAY: Skillet Fried Shrimp, Potatoes with Asparagus

Skillet fried shrimp is so easy.  I just defrost a bag of peeled, deveined, de-tailed large shrimp and rinse them off in a colander.  Melt some ghee (clarified butter) in a skillet and throw the shrimp in.  I season it with salt, pepper, and garlic powder.  I just toss the shrimp in the hot pan until the shrimp are pink and start to curl up.  I serve this with cocktail sauce for the family and awesome sauce (from Well Fed 2) for me.

Lastly I steam peeled white potatoes in a microwave steamer and also throw in a bag of Archer Farms frozen asparagus. As always fresh is best but really frozen veggies are a perfect second.  This asparagus is really tasty and super quick!

FRIDAY: Hot Dogs and Baked Sweet Potato Chunks

Friday has typically been our pizza night but this month I just needed to stay away, so instead I found some Whole30 compliant hotdogs which was super easy because they are everywhere and naturally gluten free.  They are brought to us all by Applegate!  You’d think these might not taste like the real thing but I assure you they do and they are kid approved. Thanks Applegate!  I served these with mustard and regular ketchup for the family and homemade ketchup (from Well Fed) for me.

The side dish is simply sweet potatoes cut up into chunks, tossed with extra virgin olive oil and salt/pepper. I put them in the oven at 425 degrees and bake them for about 20-40 minutes all depending on how big you cut them up.  My family dips these in ketchup like fries but I again love, love, love them with Awesome Sauce which is essentially homemade mayo with some spices added.  If I learned anything from my Whole30 is that fat is your friend and it tastes so wonderful!

SATURDAY:  Carnitas with Sautéed Onions, Peppers and Homemade Cole Slaw

We’ve been eating a lot of meat this month since it is the staple behind a Whole30 diet.  I got the recipe for the Carnitas again from the Well Fed cookbook.  It took a bit of planning for this as it is a stove top recipe that braises for hours, so make sure you have the time to be at home while it is cooking.  I wanted this to be like a fajita so I also sautéed some onions and peppers in ghee to go along with my pile of meat.

I used this meal to entertain my in-laws, so I figured I better have some other stuff available too.  That’s when the Well Fed homemade cole slaw recipe came in handy.  Since sugar is not allowed on the Whole30, I threw in some crushed pineapple to get that sweet taste that you are used to with cole slaw. It was fantastic!

I bet you all of this on a gluten free bun or waffle would be even better.  I’ll let you know once I make this again and I can have such things with abandon!